For many years, my site has been hosted at an ASP.NET hosting provider where it ran on a tiny custom CMS that I wrote myself in ASP.NET MVC 5, using a MySql database for content storage. I initially went that route because it offered the largest degree of freedom of what I was able to do with my site, but I never ended up doing much more with this freedom beyond just hosting some simple blog posts and a few static pages.
I’ve recently decided to move my site to static site hosting, which can be found for free at various places, including on GitHub. Since I already had a GitHub account, I decided to go that route. And since GitHub Pages (which is what they call their static site hosting) has great support out of the box for Jekyll, I decided to use that as my static site generator.
In this post, I’ll go over the setup for how I now “develop” my site.
WSL2
Since Jekyll is not officially supported on Windows, we’ll use the Windows Subsystem for Linux (WSL2) as our development environment. We’ll have to install it first if it’s not on our system yet. This can be done with a single command from an elevated prompt:
PS> wsl --install

Installing: Virtual Machine Platform
Virtual Machine Platform has been installed.
Installing: Windows Subsystem for Linux
Windows Subsystem for Linux has been installed.
Installing: Ubuntu
Ubuntu has been installed.
The requested operation is successful. Changes will not be effective until the system is rebooted.
This takes care of installing WSL2 along with any dependencies and the default distro (Ubuntu). One quick reboot later and we should be good to go.
Right?
No. Despite the above output suggesting that Ubuntu has been installed, we actually don’t have any distros running yet:
PS> wsl -l -v

Windows Subsystem for Linux has no installed distributions.

Use 'wsl.exe --list --online' to list available distributions
and 'wsl.exe --install <Distro>' to install.

Distributions can also be installed by visiting the Microsoft Store:
https://aka.ms/wslstore
Error code: Wsl/WSL_E_DEFAULT_DISTRO_NOT_FOUND
What neither WSL2 nor the installation guide are telling us is that CPU Virtualization needs to be enabled in the BIOS. Or as AMD calls it in my case, “SVM Mode”. Trying to install Ubuntu (or any distro) without it will result in WSL2 throwing error 0x80370114 and refusing to continue.
So, after one more reboot and a visit to the BIOS, we can actually install Ubuntu:
PS> wsl --install Ubuntu

Ubuntu is already installed.
Launching Ubuntu...
Installing, this may take a few minutes...
Please create a default UNIX user account. The username does not need to match your Windows username.
For more information visit: https://aka.ms/wslusers
Enter new UNIX username: bw
New password:
Retype new password:
passwd: password updated successfully
The operation completed successfully.
Installation successful!
To run a command as administrator (user "root"), use "sudo <command>".
See "man sudo_root" for details.

Welcome to Ubuntu 22.04.3 LTS (GNU/Linux 5.15.146.1-microsoft-standard-WSL2 x86_64)

 * Documentation:  https://help.ubuntu.com
 * Management:     https://landscape.canonical.com
 * Support:        https://ubuntu.com/advantage


This message is shown once a day. To disable it please create the
/home/bw/.hushlogin file.

bw@ELYSIUM:~$
We then get prompted to set up our UNIX account, and after doing so we are immediately dumped into a Bash session on our new Ubuntu VM. Great success.
Jekyll on WSL2
We can now move on to installing Jekyll. It’s distributed as a Ruby Gem, which means we’ll need Ruby and a few other dependencies:
bw@ELYSIUM:~$ sudo apt-get update
bw@ELYSIUM:~$ sudo apt-get install ruby-full build-essential zlib1g-dev
Before installing the Jekyll Gem, we’ll set up a Gem installation path for our user by editing our .bashrc file and appending the following lines:
# Ruby Gems installation path
export GEM_HOME="$HOME/gems"
export PATH="$HOME/gems/bin:$PATH"
The .bashrc file is executed every time a new Bash session is started, but we can simply run it again after editing it to “apply” it to our current session:
bw@ELYSIUM:~$ source .bashrc
With Ruby now set up, we can install the Gems for Jekyll and Bundler:
bw@ELYSIUM:~$ gem install jekyll bundler
We can verify the install has worked by creating a quick “hello world” site:
bw@ELYSIUM:~/dev/sites$ jekyll new hello-world

Running bundle install in /home/bw/dev/sites/hello-world...
  Bundler: Fetching gem metadata from https://rubygems.org/............
  Bundler: Resolving dependencies...
  Bundler: Fetching rake 13.2.1
  Bundler: Installing rake 13.2.1
  Bundler: Fetching webrick 1.8.1
  Bundler: Fetching rexml 3.2.6
  Bundler: Installing webrick 1.8.1
  Bundler: Installing rexml 3.2.6
  Bundler: Fetching jekyll-feed 0.17.0
  Bundler: Fetching jekyll-seo-tag 2.8.0
  Bundler: Installing jekyll-feed 0.17.0
  Bundler: Installing jekyll-seo-tag 2.8.0
  Bundler: Fetching minima 2.5.1
  Bundler: Installing minima 2.5.1
  Bundler: Bundle complete! 7 Gemfile dependencies, 34 gems now installed.
  Bundler: Use `bundle info [gemname]` to see where a bundled gem is installed.
New jekyll site installed in /home/bw/dev/sites/hello-world.

bw@ELYSIUM:~/dev/sites$ cd hello-world/

bw@ELYSIUM:~/dev/sites/hello-world$ bundle exec jekyll serve

Configuration file: /home/bw/dev/sites/hello-world/_config.yml
            Source: /home/bw/dev/sites/hello-world
       Destination: /home/bw/dev/sites/hello-world/_site
 Incremental build: disabled. Enable with --incremental
      Generating...
       Jekyll Feed: Generating feed for posts
...
Warning: 6 repetitive deprecation warnings omitted.
Run in verbose mode to see all warnings.
                    done in 0.192 seconds.
 Auto-regeneration: enabled for '/home/bw/dev/sites/hello-world'
    Server address: http://127.0.0.1:4000/
  Server running... press ctrl-c to stop.
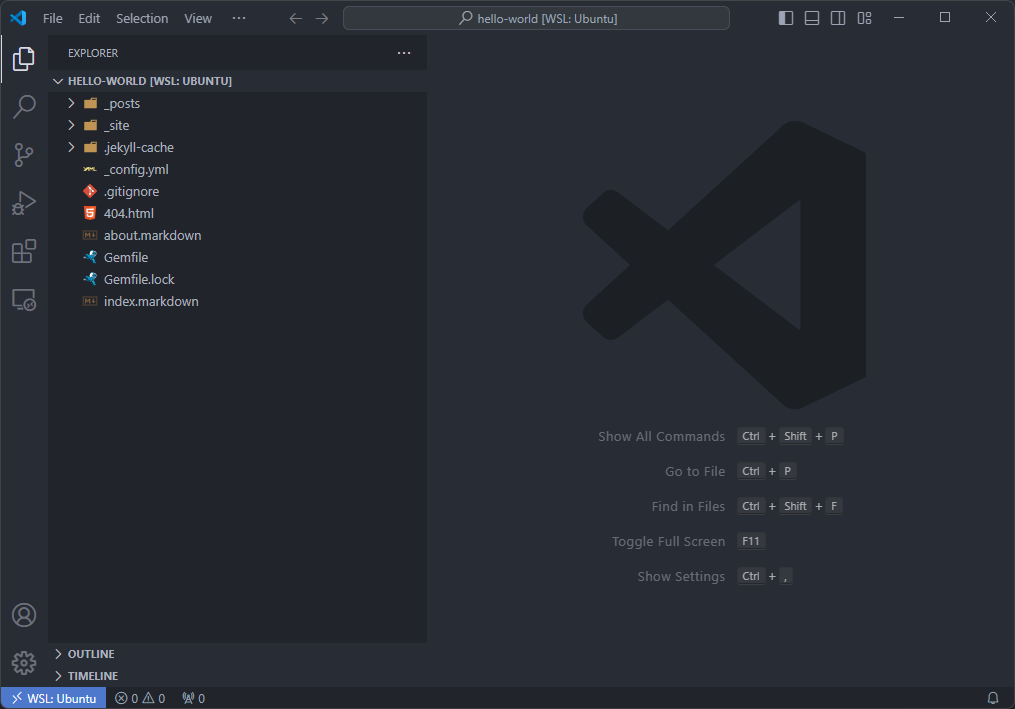
We can now browse to localhost:4000 (from Windows, which can talk to processes running in the WSL2 VMs through dark magic) and witness a simple empty Jekyll site using its default template.
VSCode on WSL2
While editing our entire site in nano is technically possible, it’s probably better for my sanity to use an actual editor, and Visual Studio Code is an excellent choice. We’ll install it on Windows as per usual, and then install the aptly-named WSL extension to make it talk to our WSL2 Ubuntu VM. We can then simply run code . from our Bash session to open VSCode into the current directory. The first time you do this, it’ll take care of installing any dependencies needed on the Ubuntu side:
bw@ELYSIUM:~/dev/sites/hello-world$ code .

Installing VS Code Server for Linux x64 (b58957e67ee1e712cebf466b995adf4c5307b2bd)
Downloading: 100%
Unpacking: 100%
Unpacked 1549 files and folders to /home/bw/.vscode-server/bin/b58957e67ee1e712cebf466b995adf4c5307b2bd.
Looking for compatibility check script at /home/bw/.vscode-server/bin/b58957e67ee1e712cebf466b995adf4c5307b2bd/bin/helpers/check-requirements.sh
Running compatibility check script
Compatibility check successful (0)
We then get a new VSCode window in Windows that is connected to WSL2:
Easy!
Git on WSL2
After the above steps, Git should already be installed on the system, which we can quickly verify:
bw@ELYSIUM:~/dev/sites$ git --version

git version 2.34.1
Good, but we’ll need to do some setup before we can work with it. We’ll need to set our user info:
bw@ELYSIUM:~/dev/sites$ git config --global user.name "Bart Wolff"
bw@ELYSIUM:~/dev/sites$ git config --global user.email "b-w@users.noreply.github.com"
Authenticating to GitHub will be done using an SSH key specifically for this machine. Let’s create one:
bw@ELYSIUM:~/dev/sites$ ssh-keygen -t ed25519 -C "GITHUB_EMAIL_GOES_HERE"

Generating public/private ed25519 key pair.
Enter file in which to save the key (/home/bw/.ssh/id_ed25519): /home/bw/.ssh/gh_ELYSIUM
Created directory '/home/bw/.ssh'.
Enter passphrase (empty for no passphrase):
Enter same passphrase again:
Your identification has been saved in /home/bw/.ssh/gh_ELYSIUM
Your public key has been saved in /home/bw/.ssh/gh_ELYSIUM.pub
Since it will be tedious to enter the passphrase every time we use this key, we’ll add it to the SSL agent:
bw@ELYSIUM:~/dev/sites$ eval $(ssh-agent -s)

Agent pid 9343

bw@ELYSIUM:~/dev/sites$ ssh-add ~/.ssh/gh_ELYSIUM

Enter passphrase for /home/bw/.ssh/gh_ELYSIUM:
Identity added: /home/bw/.ssh/gh_ELYSIUM (GITHUB_EMAIL_GOES_HERE)
To “log out”, we can simply kill the SSH agent process:
bw@ELYSIUM:~/dev/sites$ kill $SSH_AGENT_PID
Now that we have our key, we’ll copy the public part like so:
bw@ELYSIUM:~/dev/sites$ clip.exe < ~/.ssh/gh_ELYSIUM.pub
…and then add this to our GitHub settings as an authentication key. We now have everything in place to pull our code down and start working on it:
bw@ELYSIUM:~/dev/sites$ git clone git@github.com:b-w/b-w.github.io.git bw-com

Cloning into 'bw-com'...
The authenticity of host 'github.com (140.82.121.4)' can't be established.
ED25519 key fingerprint is SHA256:+DiY3wvvV6TuJJhbpZisF/zLDA0zPMSvHdkr4UvCOqU.
This key is not known by any other names
Are you sure you want to continue connecting (yes/no/[fingerprint])? yes
Warning: Permanently added 'github.com' (ED25519) to the list of known hosts.
remote: Enumerating objects: 522, done.
remote: Counting objects: 100% (89/89), done.
remote: Compressing objects: 100% (69/69), done.
remote: Total 522 (delta 4), reused 89 (delta 4), pack-reused 433
Receiving objects: 100% (522/522), 77.38 MiB | 16.57 MiB/s, done.
Resolving deltas: 100% (5/5), done.
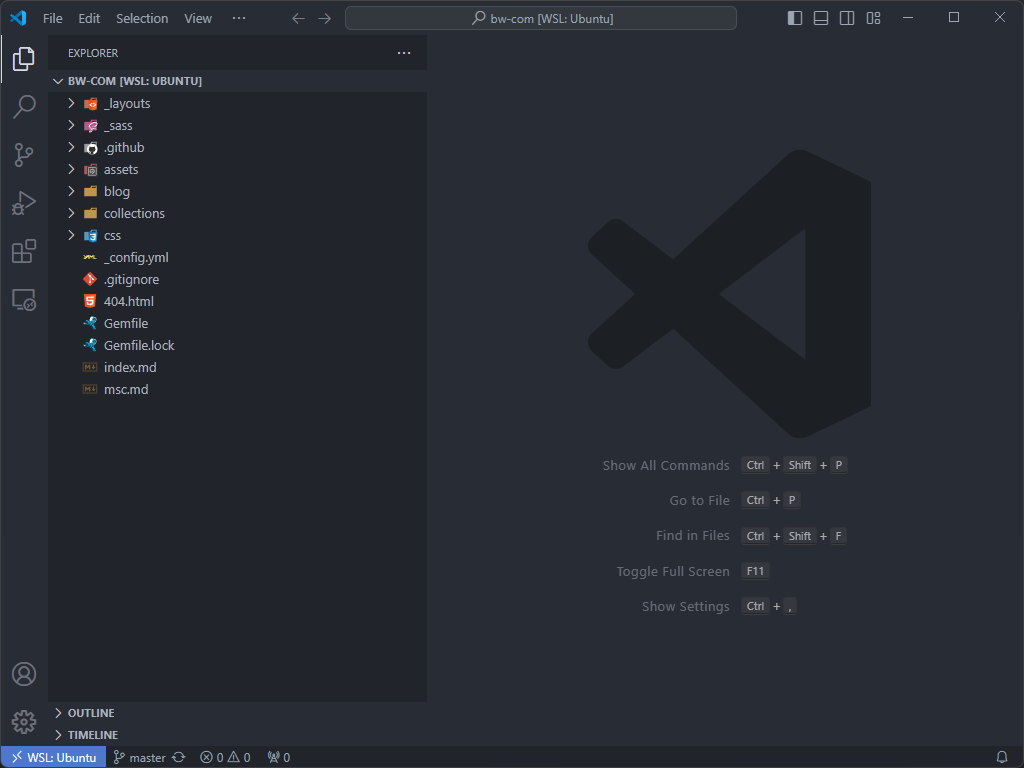
The first time we connect to GitHub, we get the above warning about the host authenticity. After verifying that the key fingerprint matches the one from GitHub’s docs, we proceed and pull down our code. We’ll open it in VSCode and we are ready to start working:
bw@ELYSIUM:~/dev/sites$ cd bw-com/
bw@ELYSIUM:~/dev/sites/bw-com$ code .
But wait, there’s more!
Although not required, it’s good practice to sign your Git commits using some kind of private key that only you control. You can use GPG for this, but as of Git version 2.34 you can also just use your SSH key. We’ll add the same key that we previously created to our GitHub settings, this time as a signing key. We then configure Git as follows:
bw@ELYSIUM:~/dev/sites/bw-com$ git config --global commit.gpgsign true
bw@ELYSIUM:~/dev/sites/bw-com$ git config --global gpg.format ssh
bw@ELYSIUM:~/dev/sites/bw-com$ git config --global user.signingkey ~/.ssh/gh_ELYSIUM.pub
This enables code signing by default for all commits, and configures the use of SSH and our SSH key.
Lastly, if we want to use Git on WSL from VSCode, which we probably will, we’ll have to configure the git.path setting on WSL:
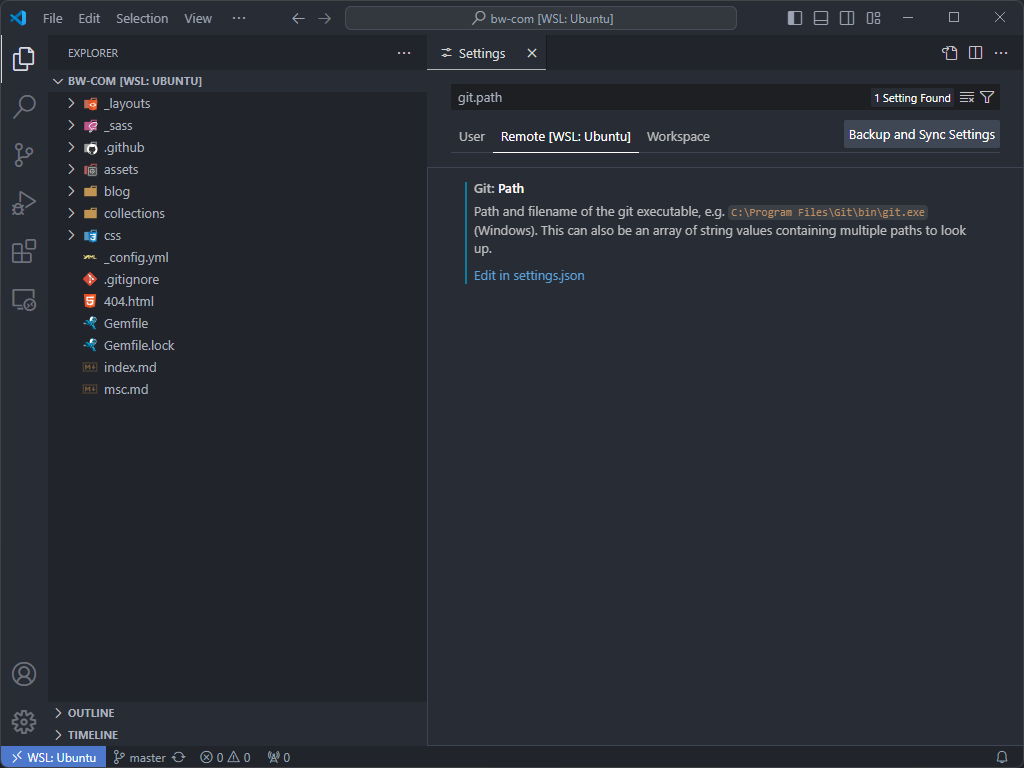
I set it to /usr/bin/git. This ensures we actually use the Git instance on WSL, instead of Git on the Windows host OS for example.
GitHub Pages
The final part is actually publishing our site on GitHub Pages. Setup is quite easy. We’ll need a repository called <GITHUB_USERNAME>.github.io. We can then open the repository settings, navigate to the “Pages” section to enable GitHub Pages publish, and select “GitHub Actions” as a source:
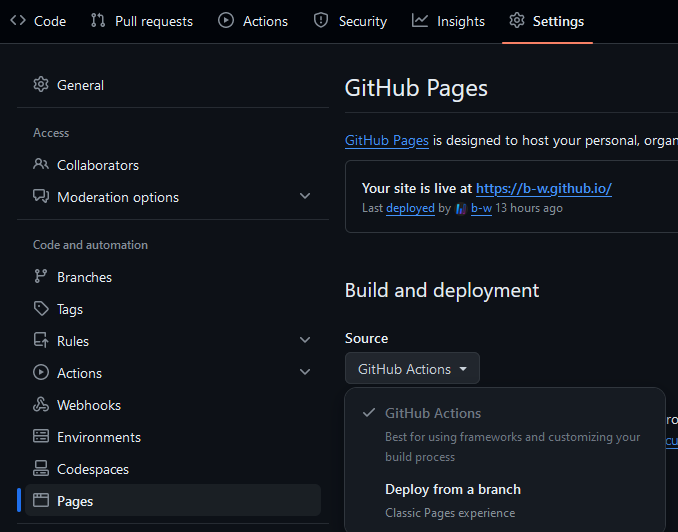
This presents us with a few different starter Actions workflows, one of which is for Jekyll sites. I’ve just used it as-is, as there was no need to change anything. Adding it creates a .yml file under the .github/workflows directory in our repository. We can watch it work under the Actions tab of our repository:
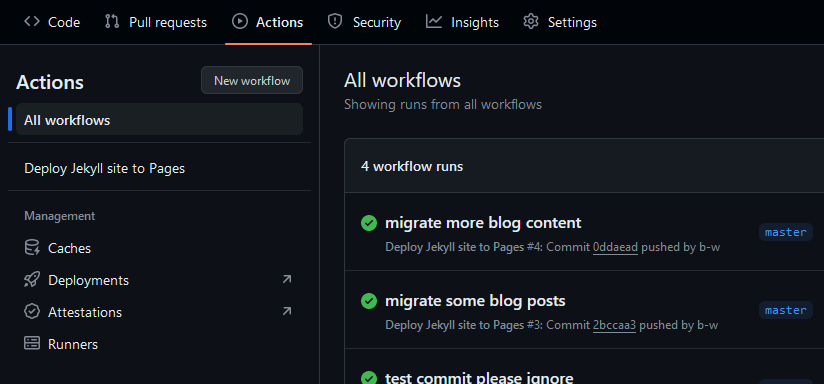
This workflow automatically triggers whenever we commit to the master branch, uses Jekyll to build our site, and publishes it to our .github.io subdomain.
And that’s it. That’s all you need to do in order to get a static site up and running using Jekyll and GitHub Pages. Easy breezy.
Building the site
With the workflow in place, we can finally move on to actually building the site. My time was spent on two main topics:
- Learning the tech, and
- migrating content.
On the tech side, there were several things I’d never worked with before: Ruby, Jekyll, Liquid templates, SASS/SCSS, and GitHub Actions. Not to mention that any HTML/CSS work is not really my forte as I am primarily a backend developer. None of these things were particularly difficult to figure out, but all of them combined did take me some time.
Other than that, migrating all of my old content also took up a significant amount of my time, mainly thanks to the large volume of blog posts. Jekyll actually has a bunch of importers that can help you quickly port an existing blog, but of course since I’m using a custom CMS, I can’t use any of them. If only I’d just used WordPress instead of being such a goddamned hipster with my homebrew artisan blog engine. I actually considered not porting my older blog posts, since pretty much all of them are garbage, but I also didn’t feel right just sending them into the memory hole. So, I bit the bullet and grinded all of them out. I was able to convert the HTML to Markdown quickly enough using an online tool, but I had to do each post one at the time and also manually fix all of the code blocks as well as the links to other pages. It actually took me several hours to get everything moved over.
But hey, here we are. A new home.
Linking our custom domain
Of course, having the site running on GitHub Pages is nice, but having a custom domain for it would be nicer. After all, dozens of visitors manage to find my homepage at bartwolff.com each year, not some *.github.io subdomain.
Fortunately, this too is surprisingly easy to set up.
All we have to do is follow GitHub’s own docs for creating a few A records in our domain’s DNS configuration, along with a CNAME record for the www subdomain that points to b-w.github.io. Then we wait a bit for this configuration to propagate. This could theoretically take several hours, or even days, but in my case the changes I made at my hosting provider here in The Netherlands were reflected in Cloudflare and Google’s DNS servers in minutes.
We can then add our custom domain in our GitHub Pages config:
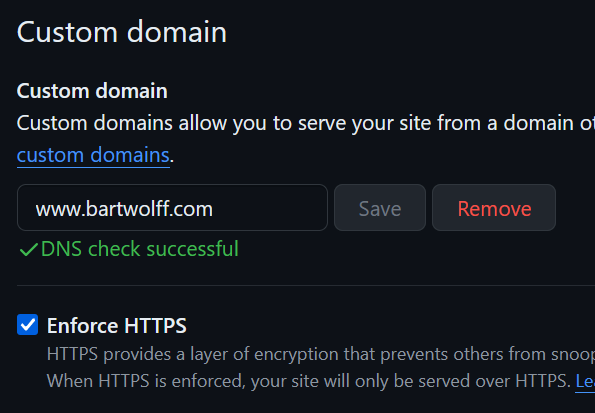
This takes a few minutes initially as GitHub generates our Let’s Encrypt certificate for us (all automatically managed behind the scenes) and then we’re good to go. Now we have our own domain pointing to a GitHub Pages hosted site, with SSL.
Hosting a (relatively) simple static site is surprisingly easy these days. Not to mention basically free, as I’m now left only paying a couple bucks each year for my domain, and have no more hosting costs. Yay!
Maintenance
Every now and then GitHub helpfully notifies us about security vulnerabilities that have been identified in one of the many Ruby gems we (directly or indirectly) rely on. There’s basically two things we need to do to keep our site’s components up-to-date:
Run this to update (globally) installed Ruby gems:
bw@ELYSIUM:~/dev/sites/bw-com$ gem update
And run this to update gems used in our project:
bw@ELYSIUM:~/dev/sites/bw-com$ bundle update
Not that a static site like this is going to run into a whole lot of issues, bit still. It’s good practice.